Passkeeper is one of the three main features of MX5, which has greatly improved previous “Magic Fill” function in MX4. In case there’s any misunderstanding or puzzle on Passkeeper’s usage, here is the third post for MX5 guideline. Please feel free to use Ctrl+F!
Where to start Passkeeper?
As we introduced before, the Passkeeper data could sync to the Cloud and be used on different platforms. Currently, Passkeeper supports four platforms: PC MX5 browser, Andriod MX5 browser, iOS MX5 browser, and Web Client.
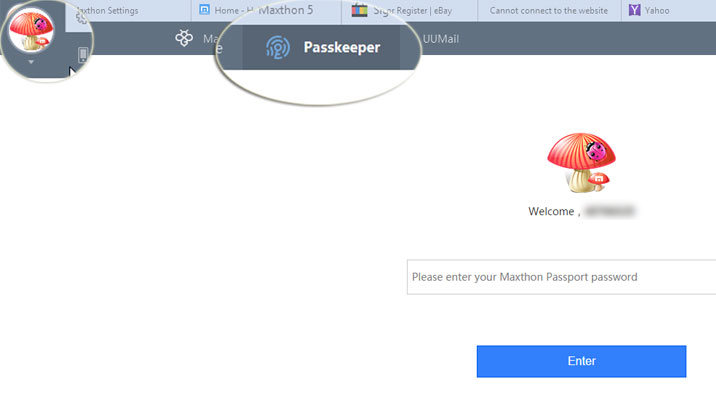
For PC browser, you can initialize Passkeeper on MX5 by clicking your avatar and then choose “Passkeeper” tab.
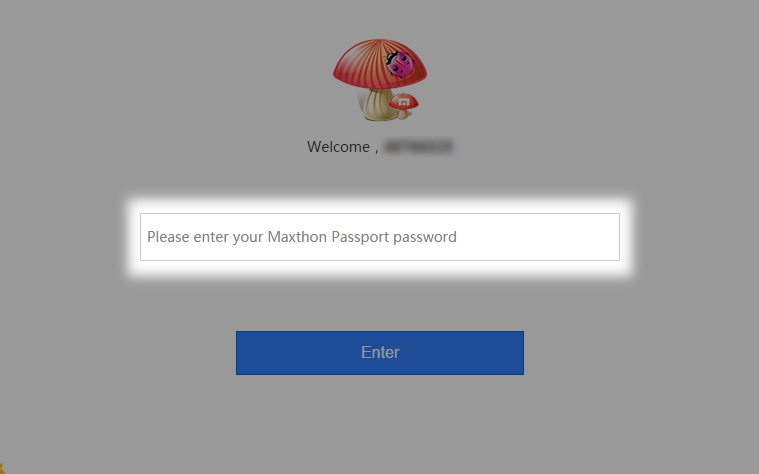
Maxthon Passport password should be entered again, to ensure your Passkeeper information will not be leaked without your awareness.
For Andriod and iOS browser, Passkeeper is set behind the Dashboard button as shown below:

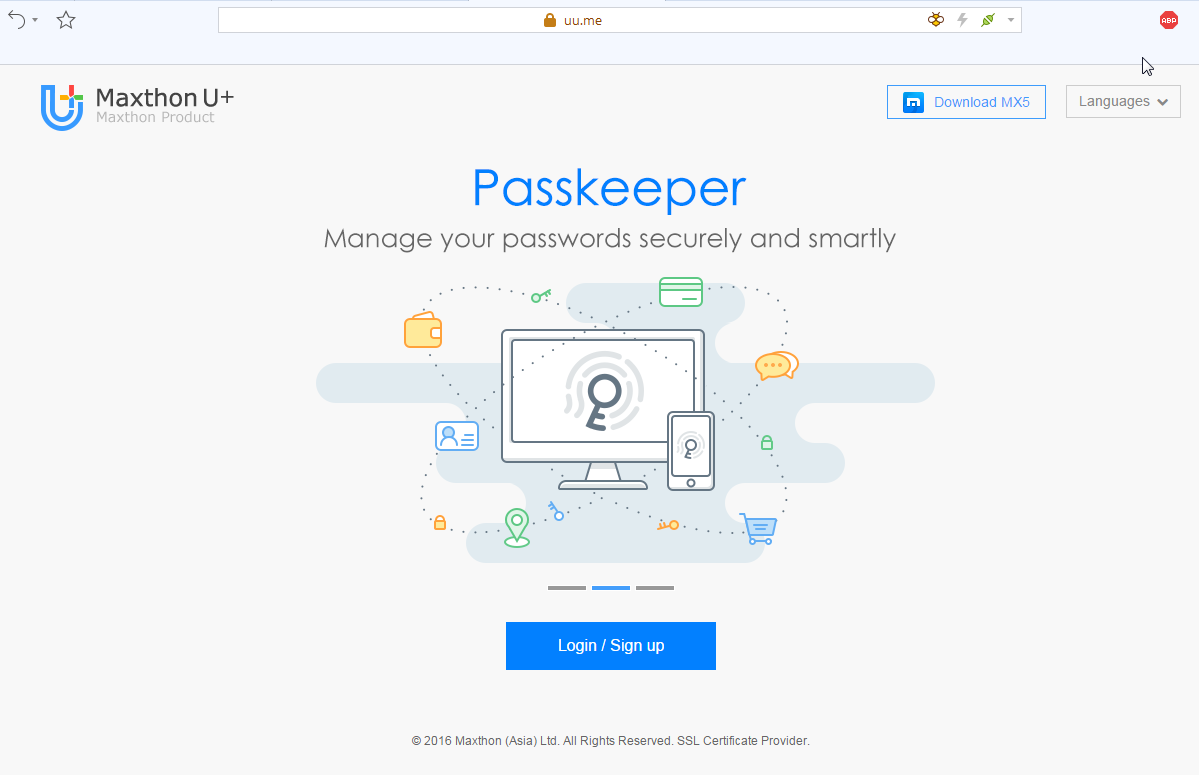
Web Client means even when you are not using any MX5 browser temporarily, you can also visit your Passkeeper on the web page by visiting https://www.uu.me/. You need to login to your Maxthon Passport account here to start Passkeeper on the web.
Given that Passkeeper functions best on PC MX5 browser, our introduction will be focused on PC end.
Actually, Passkeeper is to help you not only save and fill passwords but also generate random and complex passwords in case of registering, that means Passkeeper will be initialized automatically the moment need for passwords saving, filling or generating prompts up. If it is not launched automatically for generating passwords, you can also right-click the mouse to start it as the following animation:
Three parts of Passkeeper
After entering Passkeeper, there are mainly three parts: Accounts, Private Notes, and Autosaved Passwords.
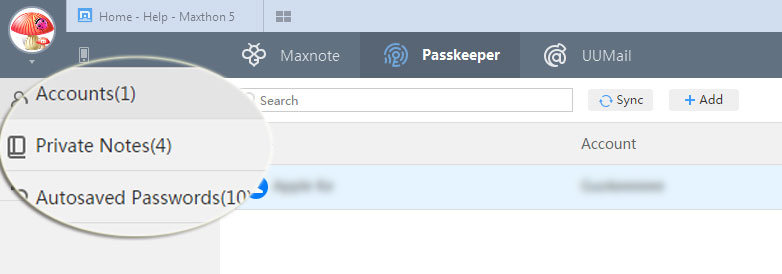
Let’s have a brief review one by one.
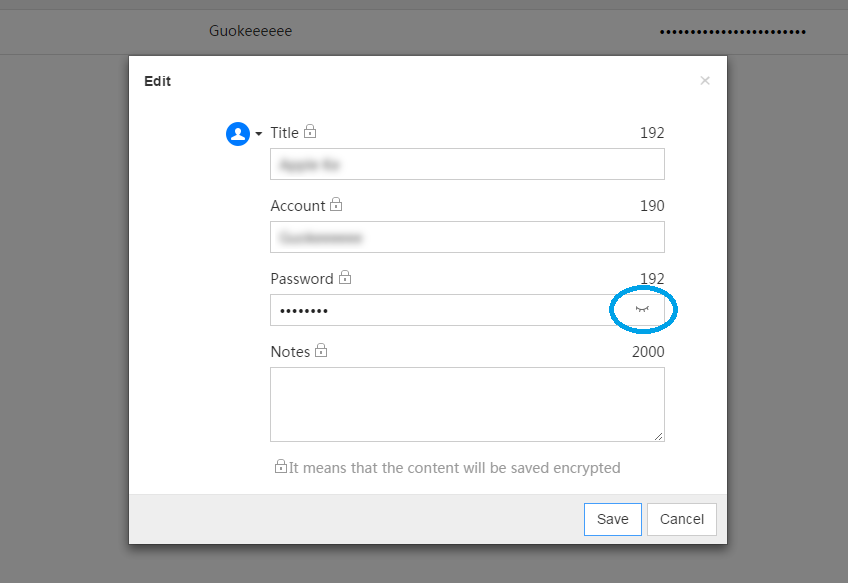
Accounts
In this section, you can save any of your account and correspondent password, together with its website or app title, just by clicking the “Add” button on top.
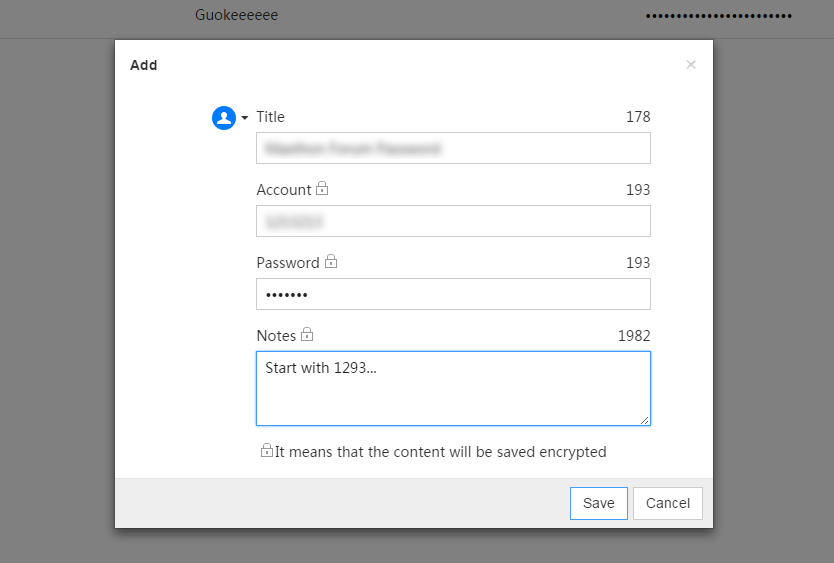
Click “Sync”, and you will sync all these information to Cloud, and visit it from any platform.

When you edit your account, password part could be shown or hidden by clicking the eye button.
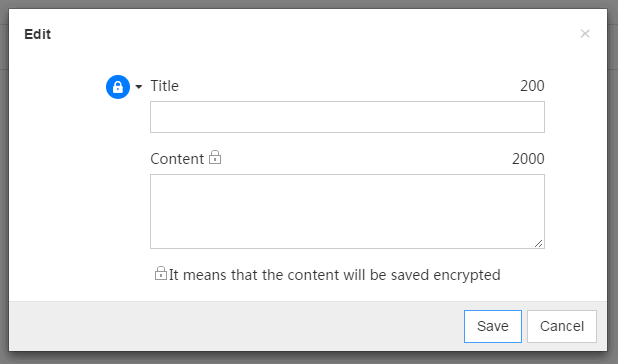
Private Notes
It is similar to “Accounts” section but more flexible with the content. When you add new Private note or edit existed item, there will be only two columns of “Title” and “Content”, so you can include more information and description in “Content”.

Autosaved Passwords
“Autosaved Passwords” section shows accounts and passwords which are saved by MX5 automatically after your permission, so “Add” button as above two sections is unavailable for this part.
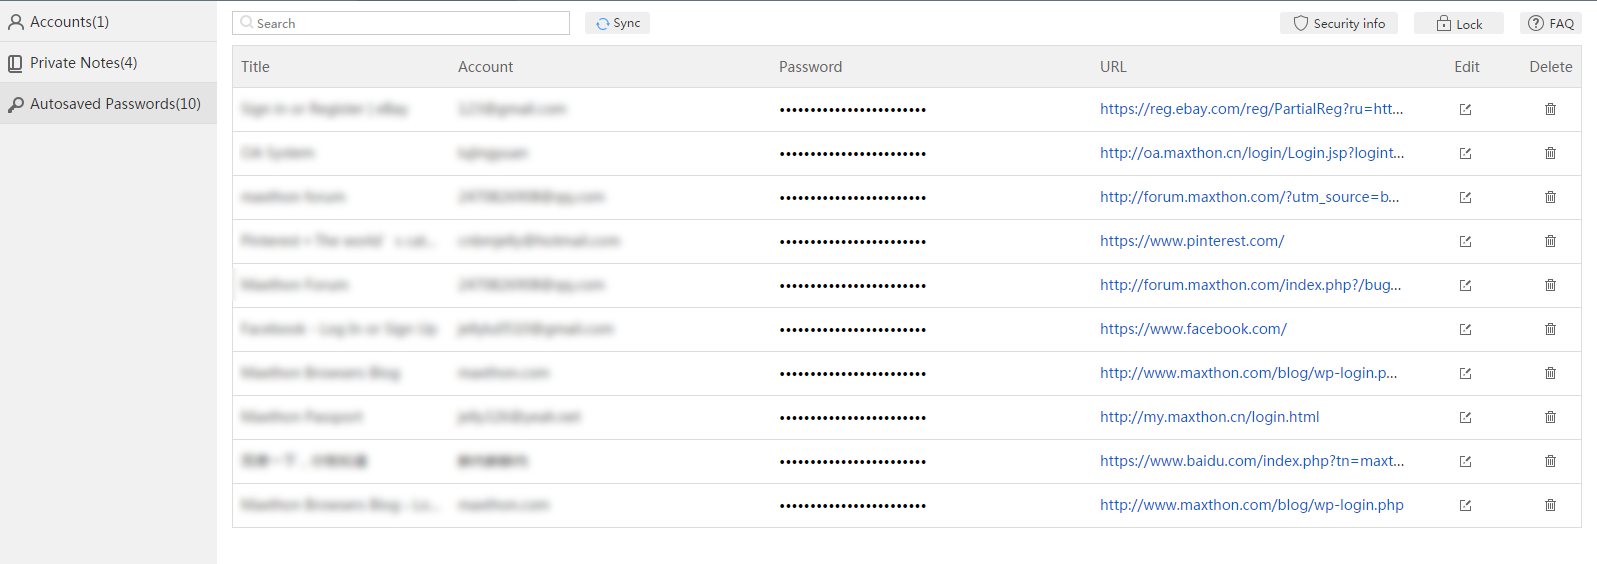
You can edit these items, or delete them if you don’t want this information to be filled automatically next time.
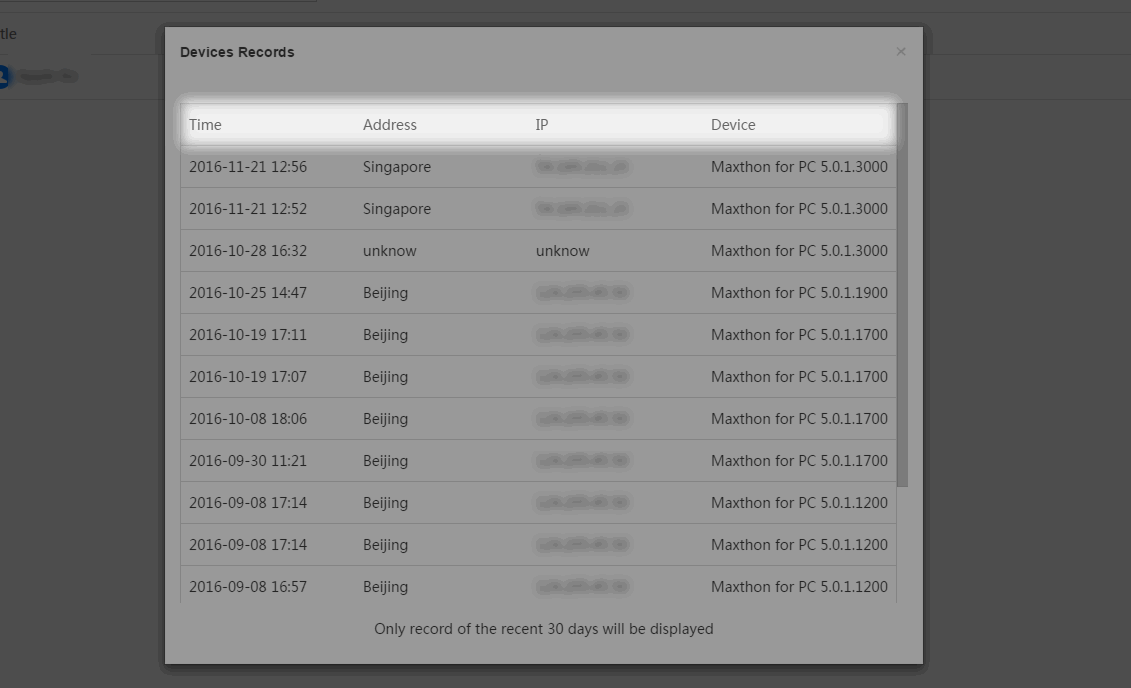
Devices Records
Passkeeper is a function related to your passwords and other private information, and Maxthon takes your information safety at top priority, so device records are here for your double check.
You can check device records from “Security info” button on upper right corner as bellows:

“Devices Records” could show you when, where, which IP, and on what device you visit your Passkeeper, so if there’s something wrong with your account, you can check “Devices Records” to identify whether your Passkeeper account was leaked and visited by anyone else.
Security Tips
Have doubts about the security of information? Here we give some FAQ about security, which could give you a more convincing explanation about your concern.
Well, above is a brief introduction about Passkeeper. Hope it is helpful for you, and if you still have any other questions, please feel free to contact us at any time.
Happy browsing!